Sorts : Différence entre versions
De Horreur à Arkham
m |
m (Mise en forme du tableau) |
||
| Ligne 10 : | Ligne 10 : | ||
<br><center><gallery> | <br><center><gallery> | ||
| − | Image:Appeler La Flamme D'Azure.jpg|[[Appeler La Flamme D'Azure]] [[Image:Icone3.jpg|Le Roi En Jaune]] | + | Image:Appeler La Flamme D'Azure.jpg|<Center>[[Appeler La Flamme D'Azure]] [[Image:Icone3.jpg|Le Roi En Jaune]] |
| − | Image:Appeler Un Ami.jpg|[[Appeler Un Ami]] [[Image:Icone1.jpg|L'Horreur De Dunwich]] | + | Image:Appeler Un Ami.jpg|<Center>[[Appeler Un Ami]] [[Image:Icone1.jpg|L'Horreur De Dunwich]] |
| − | Image:Apprentissage Forcé.jpg|[[Apprentissage Forcé]] [[Image:Icone4.jpg|L'Horreur De Kingsport]] | + | Image:Apprentissage Forcé.jpg|<Center>[[Apprentissage Forcé]] [[Image:Icone4.jpg|L'Horreur De Kingsport]] |
| − | Image:Atrophie.jpg|[[Atrophie]] | + | Image:Atrophie.jpg|<Center>[[Atrophie]] |
| − | Image:Bannissement Suprême.jpg|[[Bannissement Suprême]] [[Image:Icone1.jpg|L'Horreur De Dunwich]] | + | Image:Bannissement Suprême.jpg|<Center>[[Bannissement Suprême]] [[Image:Icone1.jpg|L'Horreur De Dunwich]] |
| − | Image:Bénédiction.jpg|[[Bénédiction]] [[Image:Icone1.jpg|L'Horreur De Dunwich]] | + | Image:Bénédiction.jpg|<Center>[[Bénédiction]] [[Image:Icone1.jpg|L'Horreur De Dunwich]] |
| − | Image:Brumes.jpg|[[Brumes de Releh]] | + | Image:Brumes.jpg|<Center>[[Brumes de Releh]] |
| − | Image:La Brume Jaune.jpg|[[La Brume Jaune]] [[Image:Icone3.jpg|Le Roi En Jaune]] | + | Image:La Brume Jaune.jpg|<Center>[[La Brume Jaune]] [[Image:Icone3.jpg|Le Roi En Jaune]] |
| − | Image:Divination.jpg|[[Divination]] [[Image:Icone1.jpg|L'Horreur De Dunwich]] | + | Image:Divination.jpg|<Center>[[Divination]] [[Image:Icone1.jpg|L'Horreur De Dunwich]] |
| − | Image:Enchanter une arme.jpg|[[Enchanter une Arme]] | + | Image:Enchanter une arme.jpg|<Center>[[Enchanter une Arme]] |
| − | Image:Flétrissement.jpg|[[Flétrissement]] | + | Image:Flétrissement.jpg|<Center>[[Flétrissement]] |
| − | Image:Fracassement.jpg|[[Fracassement]] [[Image:Icone1.jpg|L'Horreur De Dunwich]] | + | Image:Fracassement.jpg|[<Center>[Fracassement]] [[Image:Icone1.jpg|L'Horreur De Dunwich]] |
| − | Image:Implanter Une Suggestion.jpg|[[Implanter Une Suggestion]] [[Image:Icone4.jpg|L'Horreur De Kingsport]] | + | Image:Implanter Une Suggestion.jpg|<Center>[[Implanter Une Suggestion]] [[Image:Icone4.jpg|L'Horreur De Kingsport]] |
| − | Image:Invasion de Sauterelles.jpg|[[Invasion de Sauterelles]] [[Image:Icone2.jpg|La Malédiction Du Pharaon Noir]] * | + | Image:Invasion de Sauterelles.jpg|<Center>[[Invasion de Sauterelles]] [[Image:Icone2.jpg|La Malédiction Du Pharaon Noir]] * |
| − | Image:Invoquer La Bête Intérieure.jpg|[[Invoquer La Bête Intérieure]] [[Image:Icone3.jpg|Le Roi En Jaune]] | + | Image:Invoquer La Bête Intérieure.jpg|<Center>[[Invoquer La Bête Intérieure]] [[Image:Icone3.jpg|Le Roi En Jaune]] |
| − | Image:Invoquer Un Shantak.jpg|[[Invoquer Un Shantak]] [[Image:Icone1.jpg|L'Horreur De Dunwich]] | + | Image:Invoquer Un Shantak.jpg|<Center>[[Invoquer Un Shantak]] [[Image:Icone1.jpg|L'Horreur De Dunwich]] |
| − | Image:Leurre.jpg|[[Leurre]] [[Image:Icone1.jpg|L'Horreur De Dunwich]] | + | Image:Leurre.jpg|<Center>[[Leurre]] [[Image:Icone1.jpg|L'Horreur De Dunwich]] |
| − | Image:Lier_un_monstre.jpg|[[Lier un Monstre]] | + | Image:Lier_un_monstre.jpg|<Center>[[Lier un Monstre]] |
| − | Image:Linceul Des Ombres.jpg|[[Linceul Des Ombres]] [[Image:Icone2.jpg|La Malédiction Du Pharaon Noir]] | + | Image:Linceul Des Ombres.jpg|<Center>[[Linceul Des Ombres]] [[Image:Icone2.jpg|La Malédiction Du Pharaon Noir]] |
| − | Image:Les Marques D'Isis.jpg|[[Les Marques D'Isis]] [[Image:Icone2.jpg|La Malédiction Du Pharaon Noir]] | + | Image:Les Marques D'Isis.jpg|<Center>[[Les Marques D'Isis]] [[Image:Icone2.jpg|La Malédiction Du Pharaon Noir]] |
| − | Image:Nourrir L'Esprit.jpg|[[Nourrir L'Esprit]] [[Image:Icone2.jpg|La Malédiction Du Pharaon Noir]] | + | Image:Nourrir L'Esprit.jpg|<Center>[[Nourrir L'Esprit]] [[Image:Icone2.jpg|La Malédiction Du Pharaon Noir]] |
| − | Image:Ouvrir Le Troisième Oeil.jpg|[[Ouvrir Le Troisième Oeil]] [[Image:Icone3.jpg|Le Roi En Jaune]] | + | Image:Ouvrir Le Troisième Oeil.jpg|<Center>[[Ouvrir Le Troisième Oeil]] [[Image:Icone3.jpg|Le Roi En Jaune]] |
| − | Image:Poing De Yog-Sothoth.jpg|[[Poing De Yog-Sothoth]] [[Image:Icone4.jpg|L'Horreur De Kingsport]] | + | Image:Poing De Yog-Sothoth.jpg|<Center>[[Poing De Yog-Sothoth]] [[Image:Icone4.jpg|L'Horreur De Kingsport]] |
| − | Image:Prémonition.jpg|[[Prémonition]] [[Image:Icone2.jpg|La Malédiction Du Pharaon Noir]] | + | Image:Prémonition.jpg|<Center>[[Prémonition]] [[Image:Icone2.jpg|La Malédiction Du Pharaon Noir]] |
| − | Image:Procédé Alchimique.jpg|[[Procédé Alchimique]] [[Image:Icone1.jpg|L'Horreur De Dunwich]] | + | Image:Procédé Alchimique.jpg|<Center>[[Procédé Alchimique]] [[Image:Icone1.jpg|L'Horreur De Dunwich]] |
| − | Image:Quête Pour Une Vision.jpg|[[Quête Pour Une Vision]] [[Image:Icone1.jpg|L'Horreur De Dunwich]] | + | Image:Quête Pour Une Vision.jpg|<Center>[[Quête Pour Une Vision]] [[Image:Icone1.jpg|L'Horreur De Dunwich]] |
| − | Image:Rasoir Spectral.jpg|[[Rasoir Spectral]] [[Image:Icone4.jpg|L'Horreur De Kingsport]] | + | Image:Rasoir Spectral.jpg|<Center>[[Rasoir Spectral]] [[Image:Icone4.jpg|L'Horreur De Kingsport]] |
| − | Image:Rempart de Chair.jpg|[[Rempart de Chair]] * | + | Image:Rempart de Chair.jpg|<Center>[[Rempart de Chair]] * |
| − | Image:Renier le Grand Ancien.jpg|[[Renier le Grand Ancien]] [[Image:Icone2.jpg|La Malédiction Du Pharaon Noir]] * | + | Image:Renier le Grand Ancien.jpg|<Center>[[Renier le Grand Ancien]] [[Image:Icone2.jpg|La Malédiction Du Pharaon Noir]] * |
| − | Image:Révélation Des Ecritures.jpg|[[Révélation Des Ecritures]] [[Image:Icone2.jpg|La Malédiction Du Pharaon Noir]] | + | Image:Révélation Des Ecritures.jpg|<Center>[[Révélation Des Ecritures]] [[Image:Icone2.jpg|La Malédiction Du Pharaon Noir]] |
| − | Image:Signe_rouge.jpg|[[Signe Rouge de Shudde M'ell]] | + | Image:Signe_rouge.jpg|<Center>[[Signe Rouge de Shudde M'ell]] |
| − | Image:Soin.jpg|[[Soin]] | + | Image:Soin.jpg|<Center>[[Soin]] |
| − | Image:Souvenirs Brumeux.jpg|[[Souvenirs Brumeux]] [[Image:Icone1.jpg|L'Horreur De Dunwich]] | + | Image:Souvenirs Brumeux.jpg|<Center>[[Souvenirs Brumeux]] [[Image:Icone1.jpg|L'Horreur De Dunwich]] |
| − | Image:Tempête D'Esprit.jpg|[[Tempête D'Esprit]] [[Image:Icone3.jpg|Le Roi En Jaune]] | + | Image:Tempête D'Esprit.jpg|<Center>[[Tempête D'Esprit]] [[Image:Icone3.jpg|Le Roi En Jaune]] |
| − | Image:Malédiction d'azathoth.jpg|[[Terrible Malédiction d'Azathoth]] | + | Image:Malédiction d'azathoth.jpg|<Center>[[Terrible Malédiction d'Azathoth]] |
| − | Image:Trouver un portail.jpg|[[Trouver le Portail]] | + | Image:Trouver un portail.jpg|<Center>[[Trouver le Portail]] |
| − | Image:Un Aperçu Des Arcanes.jpg|[[Un Aperçu Des Arcanes]] [[Image:Icone3.jpg|Le Roi En Jaune]] | + | Image:Un Aperçu Des Arcanes.jpg|<Center>[[Un Aperçu Des Arcanes]] [[Image:Icone3.jpg|Le Roi En Jaune]] |
| − | Image:Voix De Ra.jpg|[[Voix De Ra]] | + | Image:Voix De Ra.jpg|<Center>[[Voix De Ra]] |
| − | Fichier:Voyage Astral.jpg|[[Voyage Astral]] [[Image:Icone2.jpg|La Malédiction Du Pharaon Noir]] | + | Fichier:Voyage Astral.jpg|<Center>[[Voyage Astral]] [[Image:Icone2.jpg|La Malédiction Du Pharaon Noir]] |
| − | Image:Sorts.jpg|Dos Des Cartes | + | Image:Sorts.jpg|<Center>Dos Des Cartes |
<br></gallery> | <br></gallery> | ||
<br><br> | <br><br> | ||
Version du 20 décembre 2009 à 17:14

- Les Sorts sont des rituels magiques qu’un Investigateur peut accomplir en réussissant un Test De Sort pour le Lancer.
- Ils sont considérés comme des Objets au titre des règles du jeu.
Galerie
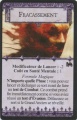 [
[Fracassement]] L'Horreur De Dunwich 
Dos Des Cartes


